Achieve VSCO effect in Lightroom :

VSCO cam application on mobile platforms has done great things to social media. It allows range of presets and editing tool to quickly get some special kind of de-saturated effect which somehow looks really really attractive than normal picture. Here in this blog we will Achieve VSCO effect in Lightroom and also Create VSCO Lightroom Preset.
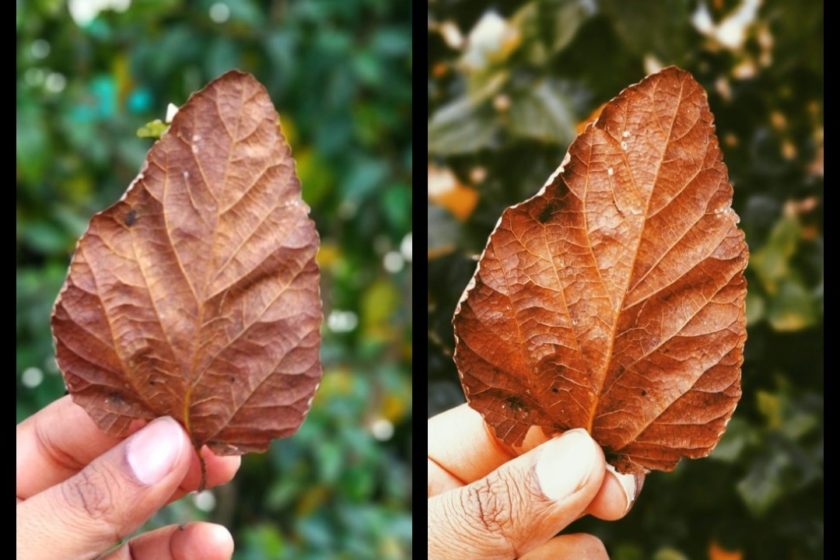
Look at below picture, Before and After VSCO :
RAW – Mobile Click from MI A1
Edited with VSCO presets (with some tight cropping):
You could see here, the processed image is much more soothing and attractive than the one before. The change in colors, saturation, white balance, tones and contrast all are what making this image better.
But again there are some downside :
- You will not get the same quality of the image as original one, because its just a preset so it never stores maximum quality and mostly suitable for phones only
- If you want to apply some of your editing techniques like curves, de-hazing, reducing noise or correction of profile then you can not do all these things in VSCO app. For that you need lightroom or photoshop.
So due to above listed issues, sometimes we want to get this effect with original quality and for that we will have to use program like Lightroom or Photoshop.
Here we will see here how to Achieve VSCO effect in Lightroom in Few Simple Steps and later we will also Create VSCO Lightroom Preset :
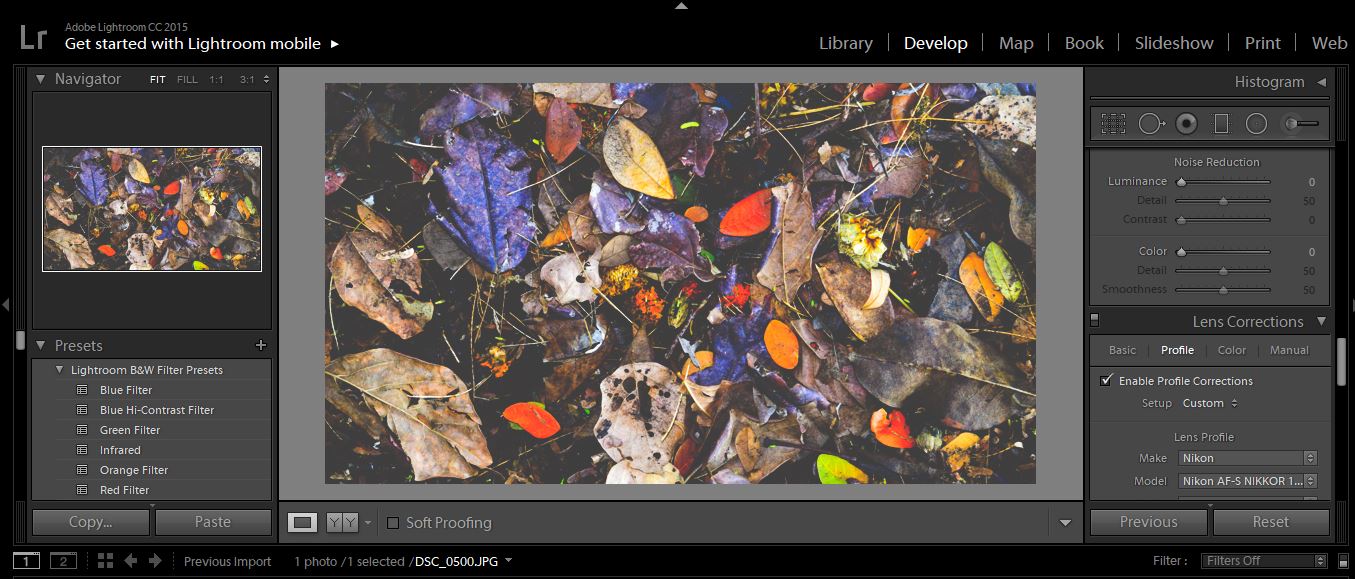
Step 1:
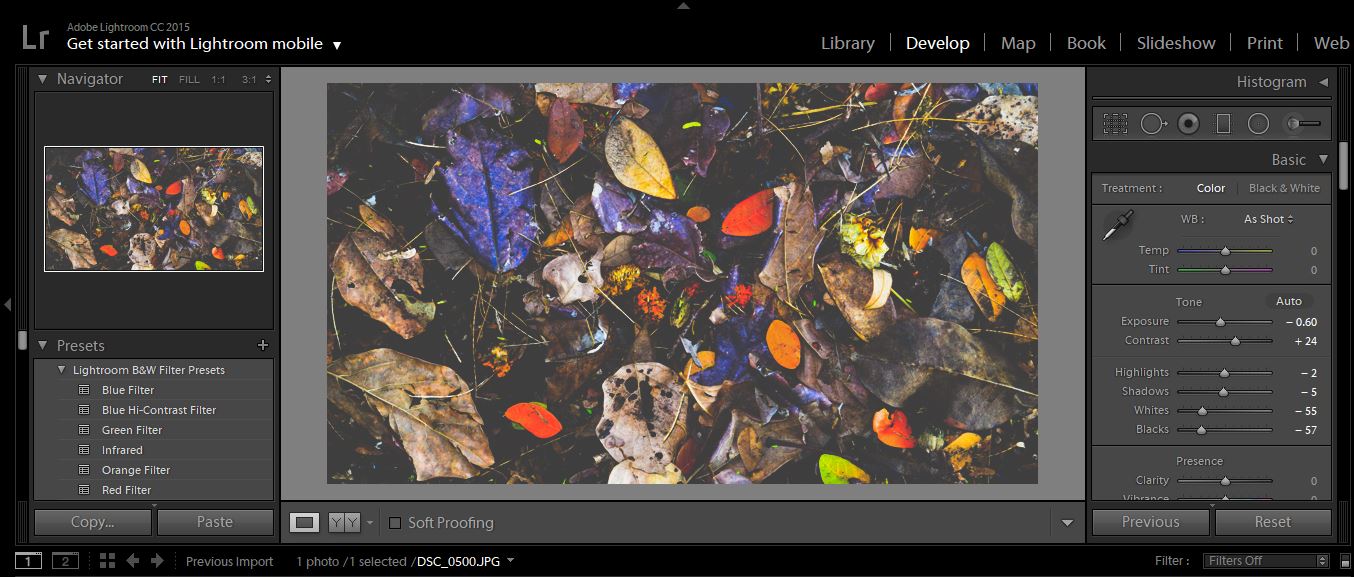
Open you intended image in LR and go to develop module which is just after library :
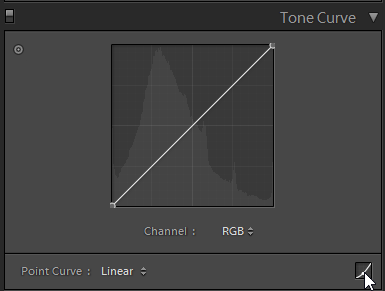
Step 2:
Look for the tonal curve setting to right of your screen like below. Make sure the the line which spans from top right to bottom left is straight. If it looks like the image below, then you’re good. If not, click on the bottom-left icon to switch to it. This mode lets you fully adjust the tone curve without using the sliders.
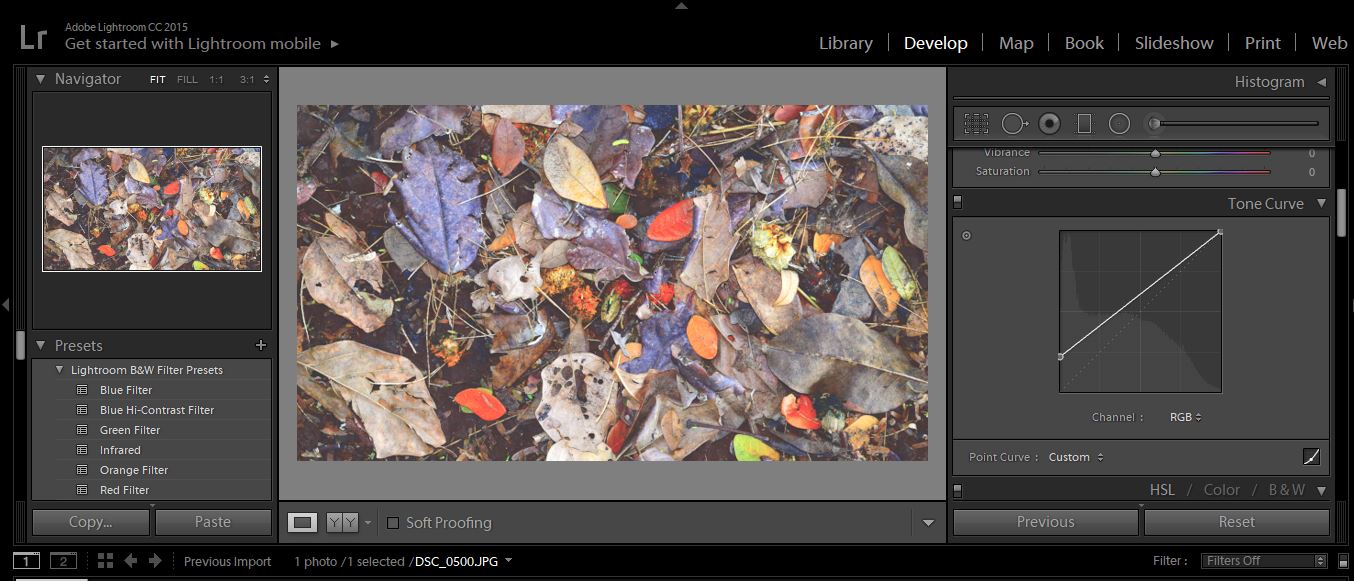
Step 3:
Now we will achieve the fade effect. This curve will fade the image as strong as you want. Now just drag the bottom-left point up and you’ll start to see the fade effect. It will look washed out. Also make sure you are dragging this line alone with border on left side of rectangle.
Step 4 :
You won’t believe you are done. This is VSCO effect, the fade effect or de-saturated effect in your picture. Now you can keep this as it is if you want or you can create S curve on the other side of the tone curve. Also try to drop the top-right node to fade the highlights a bit.

Step 5:
After getting this effect, you can work on colors. You can play with colors, whites, Blacks, HSL or camera calibration to get the final result :
I hope this tutorial is helpful for you to achieve VSCO effect in Lightroom. If it does, please share this article.
Create VSCO Lightroom Preset
A Lightroom preset is a pre-determined setting and values of different sliders in Lightroom application. A preset is a selection of edits that you choose to apply to a photo that can be saved to be easily applied later on the other pictures in Lightroom.
How to Create VSCO Lightroom Preset :
Once you done with the final changes for VSCO as explained above, follow below steps to create VSCO preset :
Step 1:
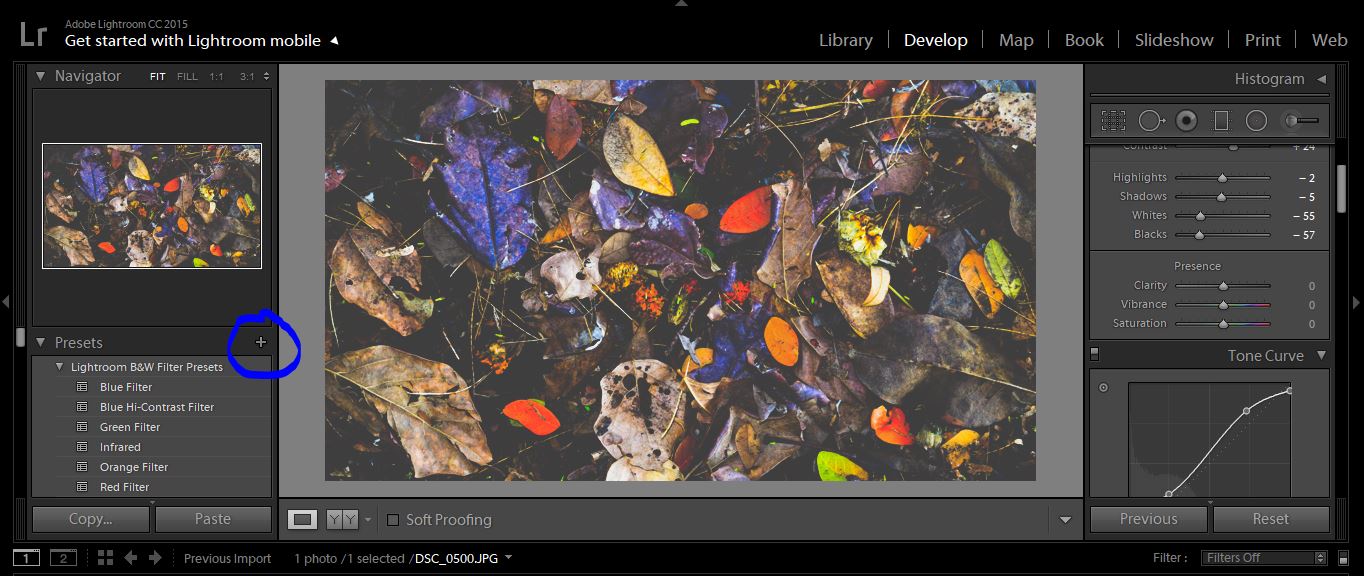
At the top of the navigator on the left-hand side panel, you’ll see an option that says “Presets.” Here you’ll find a series of presets already housed within Lightroom.
Step 2:
Click the “+” sign to add a new preset.
Step 3:
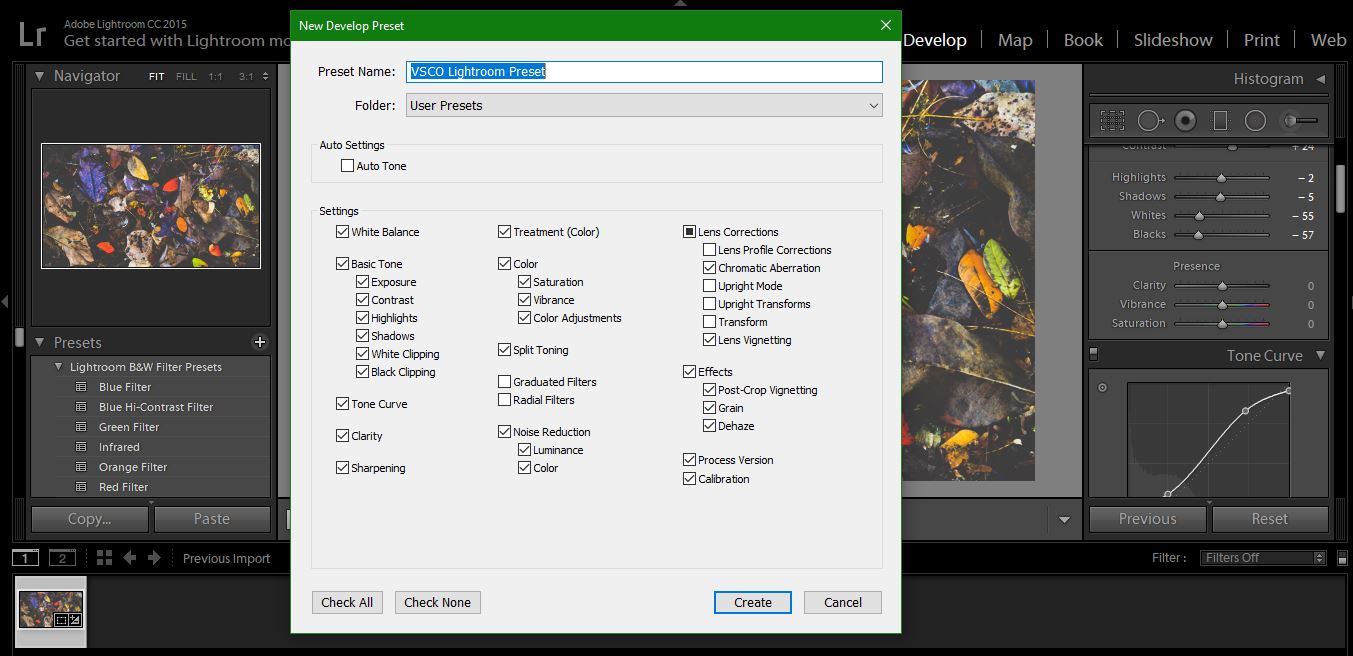
A menu will pop up and direct you to select which settings you’d like for your preset. If you’re just getting started and aren’t sure what to select, choose them all. You can make adjustments later or create variations on another preset you create.
Step 4:
Choose an applicable name for your preset.
Step 5:
Choose an applicable name for your preset. aScroll down and find the option that reads “User Presets.” This is where you’ll find your new preset.
Step 6:
Select another photo in Lightroom.
Step 7:
Choose the preset in your user preset list. Your preset will apply to the photo.
Click 2MIN Tutorial to learn more on different post processing techniques which is soo easy and brings so much life to image.